#3.0: The Document Object
JavaScript가 브라우저를 어떻게 움직이게 하는지 알아보자.
HTML은 CSS와 JavaScript를 가져온다.
JS를 사용하는 이유는 HTML과 상호작용하기 위해서이다. 즉, HTML의 요소들은 JS를 통해 변경하고, 읽을 수 있다는 것이다.
document
console에 document라고 입력하면 작성한 HTML을 가져올 수 있다.
document는 사용자가 접근할 수 있는 HTML을 가리키는 객체로, 브라우저에 이미 존재하는 object다.
HTML의 내용을 JS의 관점으로 보여준다.
JS는 HTML에 접근하고 읽을 수 있게 설정되어 있다.
document.title
document.title 이라고 콘솔에 입력하면 html에서 title 태그로 지정한 내용이 뜬다. ex. "momentum"
JS(console)에서 HTML을 읽어올 뿐만 아니라, HTML을 변경할 수도 있다
document.title = "lalalalala"
document.title = "lalalalala" 이라고 콘솔에 입력하면 그것이 브라우저에 적용된다.
새로고침하면 다시 돌아오긴 한다.
document.body
document.body를 입력하면 html 파일의 body 태그 안을 불러온다.
JavaScript가 HTML에 이미 연결되어 있다.
document는 HTML을 의미한다.
#3.1: HTML in Javascript
JS로 정보를 가지고 올 수 있는 방법은 document 객체와, element를 가져오는 수많은 함수들을 이용하는 것이다.
JS는 HTML element를 가지고 오지만, HTML 자체를 보여주진 않는다. JS는 JS에서 이 HTML을 표현하는 object를 보여준다.
HTML의 Element를 JS로 다룰 수 있게 만들어 보자!! -> ID 이용
1. HTML에서 id를 추가한다. -> <h1 id="title">Grab me!</h1>
2. JS에서 getElementById라는 함수로 그 element를 가져온다. -> document.getElementById("title");
3. JS에서 title이라는 변수에 그 element를 할당한다. -> title=document.getElementById("title");
4. JS에서 HTML에 작성한 element를 수정할 수 있는 상태가 되었다. -> title.innerText = "Got you!"
#3.2: Searching For Elements
class로 가져오기
class를 가져오는 함수는 아래와 같다.
getElementByClassName()
이 함수를 사용하면 return 값은 배열이다. class는 여러 번 사용가능하기 때문이다.
// JS

const title=document.getElementsByClassName("ddong");

console.log(title);
// HTML
<body>
<div class="hello">
<h1 class="ddong">Grab me!</h1>
<h1 class="ddong">Grab me!</h1>
<h1 class="ddong">Grab me!</h1>
</div>
<script src="app.js"></script>
</body>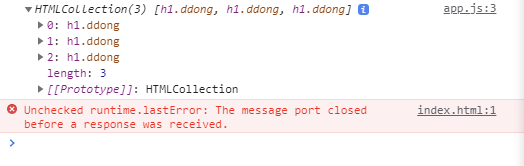
tag로 가져오기
tag는 anchor(a), div, section, button 같은 것들을 의미한다.
tag를 가져오는 함수는 아래와 같다.
getElementsByTagName()
// JS
const title=document.getElementsByTagName("h1");

console.log(title);
<!----- HTML ---->
<body>
<div class="hello">
<h1 class="ddong">Grab me!</h1>
<h1 class="ddong">Grab me!</h1>
<h1 class="ddong">Grab me!</h1>
</div>
<script src="app.js"></script>
</body>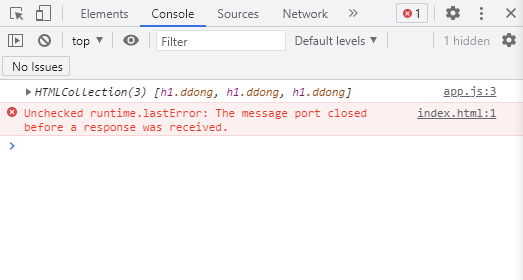
class를 가져오든, tag를 가져오든 return 값은 object 자체가 아니고 array이다. 따라서 .을 이용한 문법이 불가능한 상태이다.
그렇다면 element를 가져오기 위해서 어떤 것을 이용하는 것이 좋을까?
바로 querySelector와 querySelectorAll이다.
querySelector
element를 CSS 문법 방식으로 검색할 수 있다. 거의 이것을 사용할 것이다.
조건에 해당하는 여러 개의 요소들이 있어도, 단 하나!의 요소를 return한다.
document.querySelector()
// JS
const title=document.querySelector(".hello h1");

console.log(title);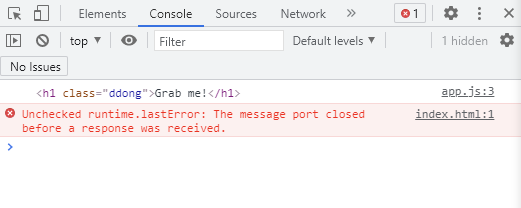
querySelectorAll
querySelector과 달리 조건에 부합하는 모든 element들을 가져다 준다.
배열로 return된다.
#3.3: Events
console.dir()
()안 element의 내부를 보고 싶을 때 사용한다.
JS에서 style -> color 에 접근하는 방법은 아래와 같다.
즉, h1의 style을 JS에서 변경하는 방법이다.
console.dir()을 이용하여 콘솔에 띄운 요소의 object 구성을 찾아본다.
거기서 style을 찾고 style 안에서 또 color 특성을 찾는다.
이로써 관계를 파악한다. 파악한 관계를 바탕으로 js에 작성한다.
title.style.color = "blue" ; 라고 적으면 blue 로 색을 바꿀 수 있다.
<!--HTML-->
<body>
    <div class="hello">
      <h1>Grab me 1!</h1>
    </div>
    <div class="hello">
      <h1>Grab me 2!</h1>
    </div>
    <div class="hello">
      <h1>Grab me 3!</h1>
    </div>
    <script src="app.js"></script>
  </body>
const title=document.querySelector("div.hello:first-child h1");
console.dir(title);
title.style.color = "blue";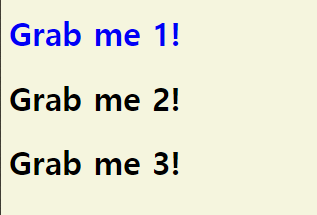
event?
JavaScript에서 대부분 작업할 일은 event를 listen하는 것이다.
click, hover, enter 등이 event에 해당한다.
eventListener
말그대로 event를 listen하는 것이다.
addEventListener() 함수를 이용하여 event를 추가할 수 있다.
이 함수는 아래의 두 인자가 필요하다.
1. 어떤 event를 listen하고 싶은지 -> ex. click
2. 유저가 이 element에 해당 event를 했을 때 어떤 함수를 실행할지 -> ex. handleTitleClick
아래의 코드는 title을 클릭했을 때 "title was clicked!"라는 메세지가 표시되도록 한다.
// JS
const title=document.querySelector("div.hello:first-child h1");

function handleTitleClick() {
  console.log("title was clicked!");
}
// 두 번째 인자에 ()을 안 붙이는 것이 중요하다.
title.addEventListener("click",handleTitleClick);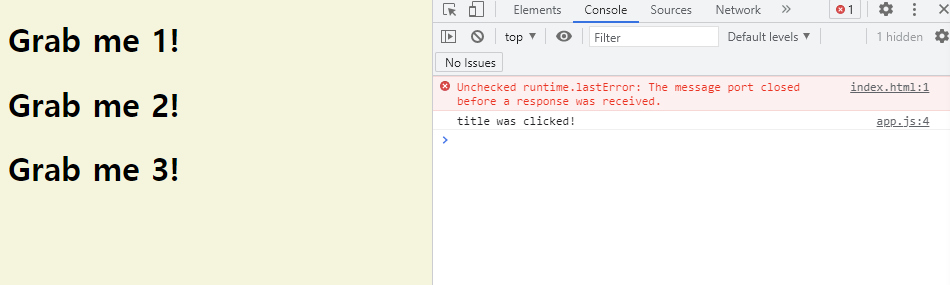
아래의 코드는 title을 클릭했을 때 텍스트가 blue 색으로 바뀌게 한다.
// JS
const title=document.querySelector("div.hello:first-child h1");

function handleTitleClick() {
  title.style.color="blue";
}

title.addEventListener("click",handleTitleClick);
#3.4: Events part Two
listen하고 싶은 event를 찾는 가장 좋은 방법은 아래와 같이 구글링하는 것이다.
"(찾고 싶은 element의 이름) html element mdn" + Web APIs
링크에 Web APIs라는 문장이 포함된 페이지를 찾는다.

JS 관점의 HTML Heading Element란 의미이다.
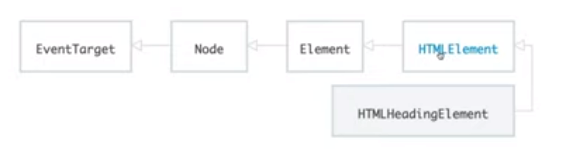
HTMLHeadingElement는 HTMLElement이다.
console.dir로 element를 조회해봤을 때
'on'이 앞에 붙은 것은 event들이다.
아래는 마우스를 올려뒀을 때 console에 문장을 보여주는 코드이다.
//JS
const title=document.querySelector("div.hello:first-child h1");

function handleTitleClick() {
  title.style.color="blue";
}

function handleMouseEnter(){
  console.log("mouse is here!")
}

title.addEventListener("click",handleTitleClick);
title.addEventListener("mouseenter",handleMouseEnter);
아래는 마우스 커서를 올리고 내릴 때 innerText가 달라지도록 하는 코드이다.
//JS
const title=document.querySelector("div.hello:first-child h1");

function handleTitleClick() {
  title.style.color="blue";
}

function handleMouseEnter(){
  title.innerText = "Mouse is here!";
}

function handleMouseLeave(){
  title.innerText = "Mouse is gone!";
}

title.addEventListener("click",handleTitleClick);
title.addEventListener("mouseenter",handleMouseEnter);
title.addEventListener("mouseleave",handleMouseLeave);
#3.5: More events
event를 추가하는 법은 두 가지이다.
1. title.addEventListener("click",handleTitleClick);
위에서 소개한 방법이다.
이 방법을 사용하면 나중에 removeEventListener를 통해서 event listener를 제거할 수 있기 때문에 더욱 선호된다.
2. title.onclick = handleTitleClick;
이런 방법도 있다. (변수).on(eventname) = (함수이름); 으로 작성하면 된다.
window는 브라우저 창을 말한다.
documentm의 body, head, title은 중요하기 때문에 따로 존재한다.
사용해본 event listening
1. click
2. mouseenter
3. mouseleave
4. resize
5. copy
6. offline
7. online
JS는 대소문자 구분이 살짝 킹받는다.
대소문자 다르게 쓰면 실행이 안 된다고 하는데 잘 구분해서 써야겠다. hㅏ...
이거 안 헷갈리기 위해서는 명확한 나만의 규칙을 세우고 잘 지켜야하지 않을까 싶다. 오엠쥐이이이
'Study > Web' 카테고리의 다른 글
| [JS] 바닐라 JS | #4.0~4.6) 입력폼 만들기 (0) | 2021.08.03 |
|---|---|
| [JS] 바닐라 JS | #3.6~3.8) CSS와 JS를 분리하기 (0) | 2021.07.30 |
| [JS] 바닐라 JS | #2.7~2.16) 함수의 사용 & 조건문 (0) | 2021.07.28 |
| [JS] 드림코딩 | #6) 클래스와 오브젝트의 차이점 & 객체지향 언어 (0) | 2021.07.28 |
| [JS] 바닐라 JS | #2.1~2.6) 여러가지 데이터 타입 & 배열 & 오브젝트 (0) | 2021.07.27 |


